How to Create Saved Searches in Reify Grids

Have you ever found yourself running an application, searching and filtering through thousands (maybe millions) of rows of data, and wanting to save the search activity for use later?
If so, the Saved Search feature in Reify is just what you need! Reify is an agile low-code development platform packed with powerful features – including Saved Search – to help you improve productivity and efficiency.
Having a way to save searches is a necessity for large enterprises with various grid filtering operations.
Imagine, as one example, that you have to search and filter your data every day for customers based in different countries or regions, with sales above or below a set amount, and then group them based on the number of previous purchases. This, plus many other search scenarios, would make up the standard data requirements that you need every day.
Having to reset and rebuild all the search criteria every single time for different needs can be a massive drain on your time and effort. Reify’s Saved Search feature delivers superior levels of productivity for your team and end-users, in a way that most products can’t.
In this guide, we’ll show you how to create and access saved searches in Reify, without having to write a single line of code!
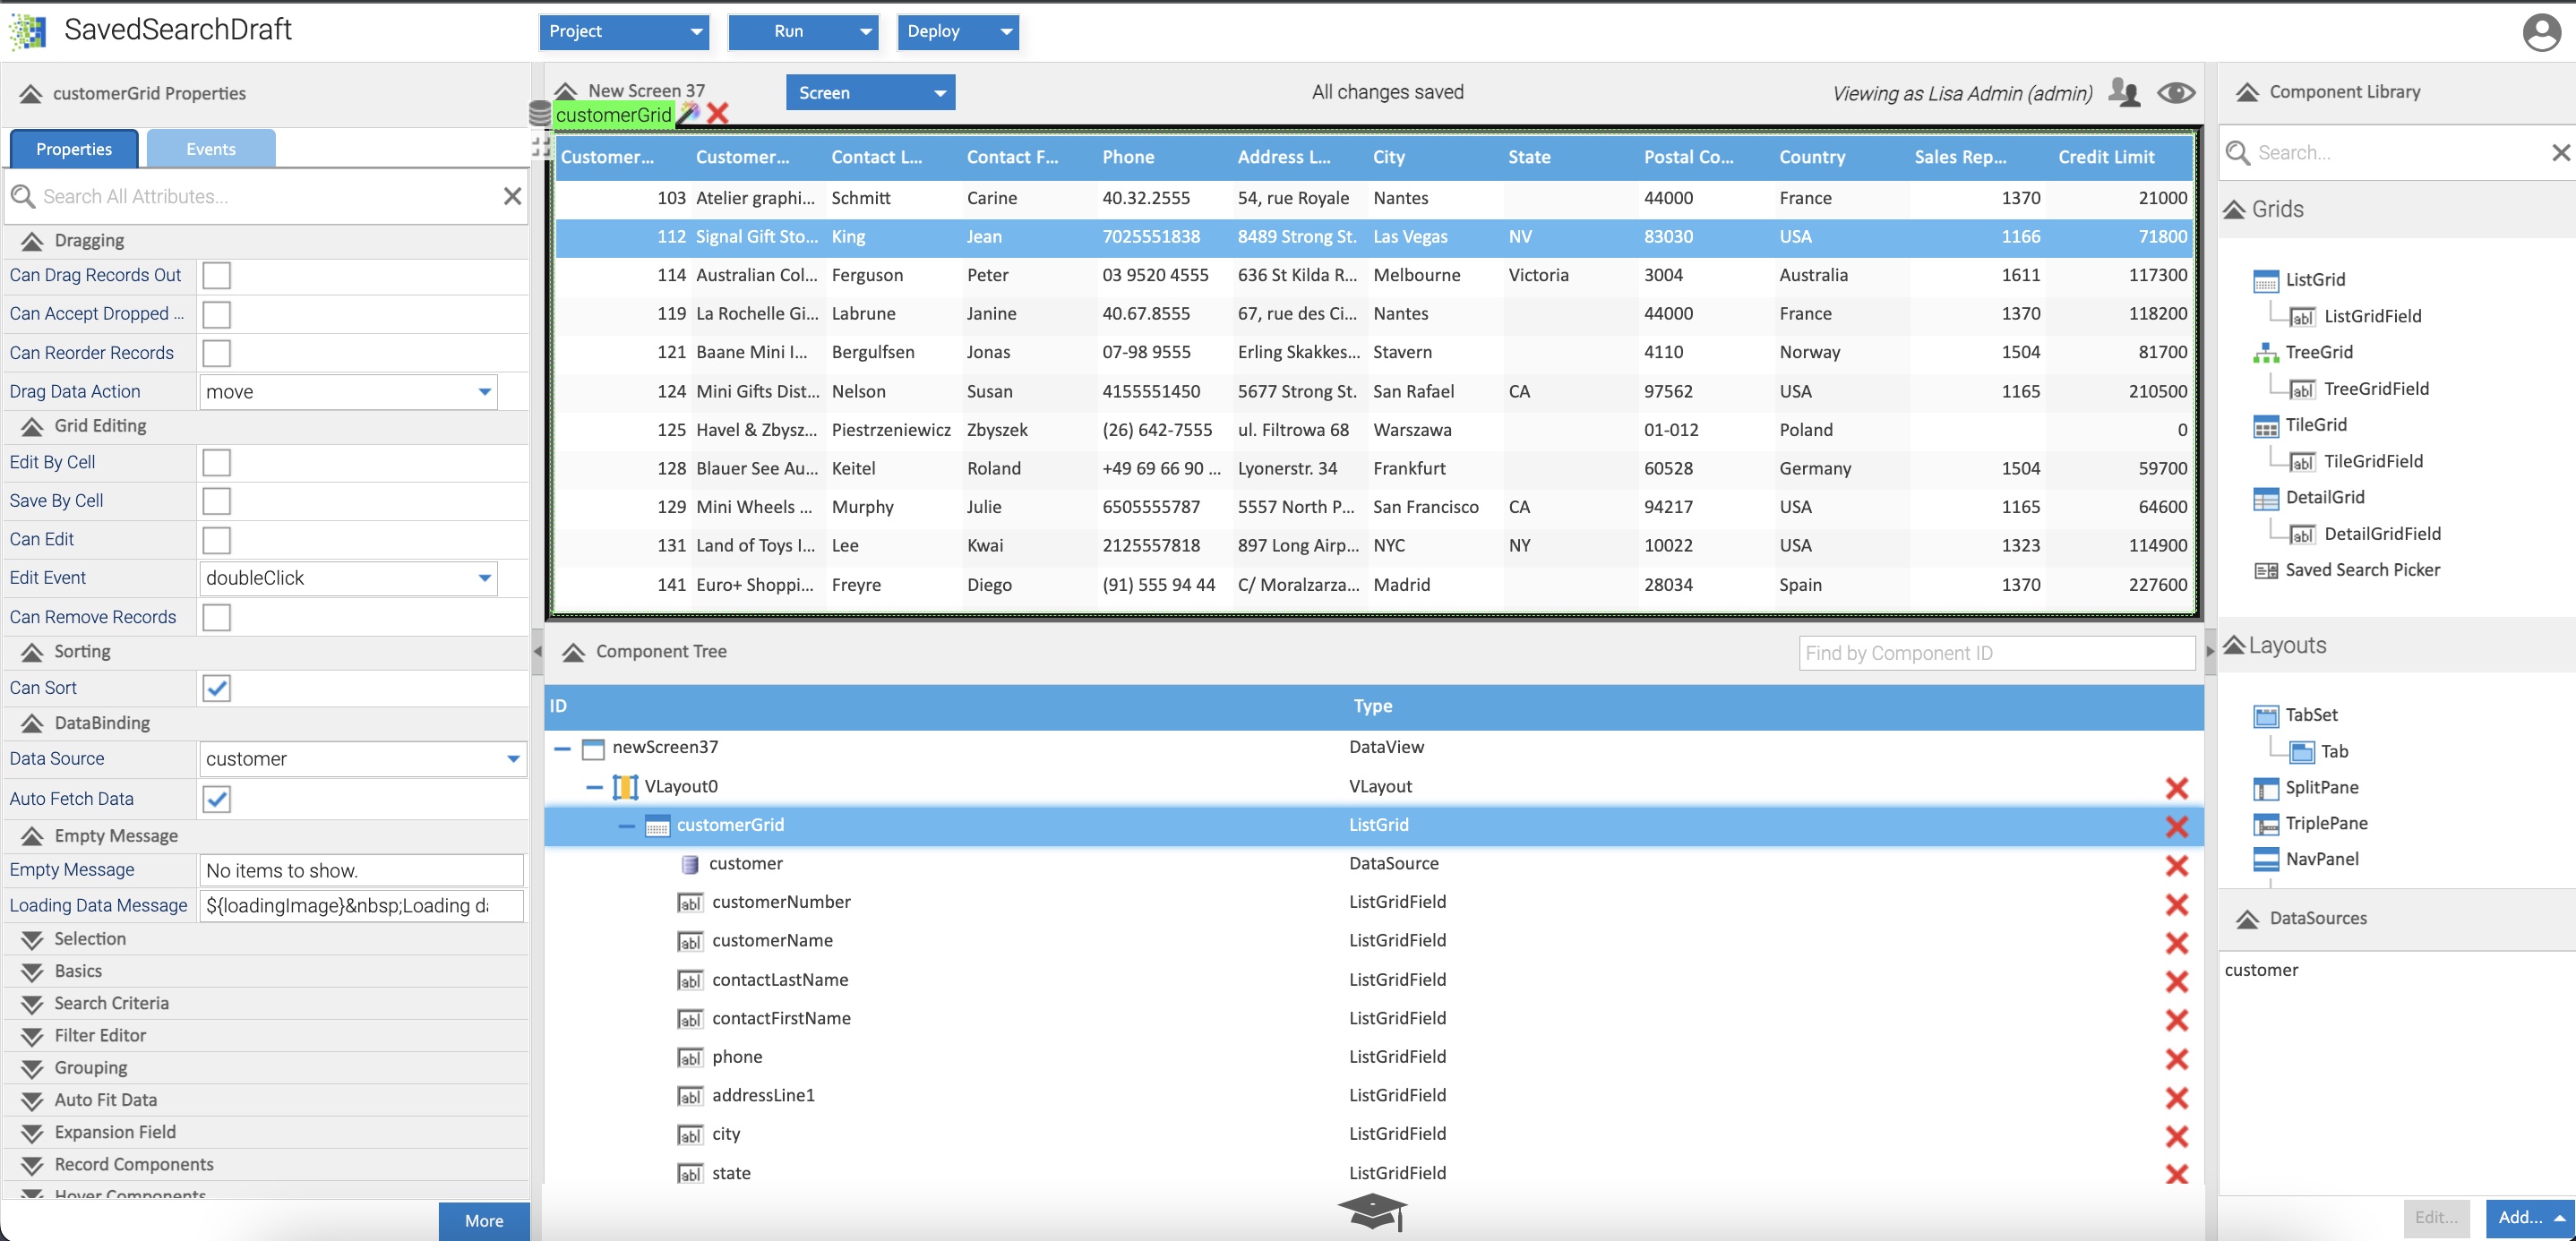
We’ll be using one of our built-in DataSources for this task, which is a list of customers. To import the Customer DataSource, in the DataSources section at the bottom-right corner of your screen, click Add->Copy an existing DataSource and just select Customer.
Build the screen layout
Now that your DataSource is ready, let’s start building!
First, let’s design the screen layout.
- Drag and drop a VLayout onto the Edit Pane from the component palette.
- Now add a ListGrid, with a double-click, to the VLayout and bind it to the Customer DataSource, again with a double-click.
- Your screen should now look like this:
We’re now ready to start saving searches in Reify.
Filter and save searches in a grid using a filter row
Enterprises have unique and complex search operations – and Reify excels at this effortlessly because of its powerful and comprehensive capabilities.
To show a filter row directly in the ListGrid, navigate to the Properties tab, type “filter” in the search field, then set “Show Filter Editor” to true.
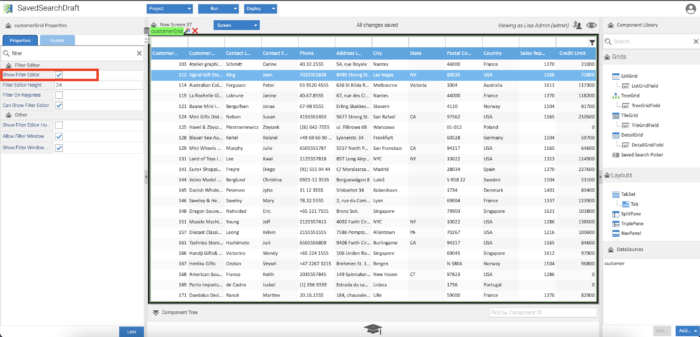
A new row appears at the top of the grid where you can filter and search the columns. See how convenient and easy that is? That’s the power of Reify!
To show how Reify delivers enterprise-grade search experiences, we’ll be filtering the grid data based on a number of use cases:
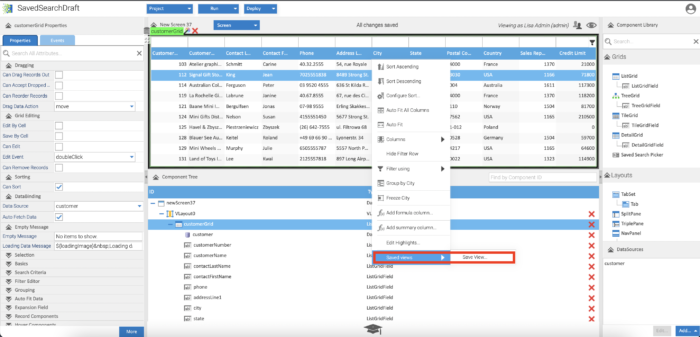
- Before we filter the grid, let’s save the initial view as default. To do that, right-click on any column header, and navigate to Saved views->Save view. Save the current grid view as “Standard”, and set “Mark as Default” to true.
- Using the Filter Row, let’s query the table for California-based customers. In the “State” column, simply type ‘CA’. To save this search, repeat the previous action to navigate to Saved views->Save view and save the current grid view as “CA-based”.
What you can now see if you navigate to the Saved view list again, is there are two saved views – “Standard” (the initial and default view) and “CA-based”. Toggle easily between both saved searches.
- Let’s continue and add another simple criteria-based search, by filtering the ListGrid for customers that are not US based. Right-click on the “Country” column in the filter row, and set it to not equal (match case)-> ‘USA’. Using the same approach as above, save the search as “Not-USA”.
- Finally, we’ll add a more complex multi-criteria search by filtering the grid to show customers in Spain that have credit limits over $100,000. Return to your standard view, then select ‘Spain’ from the “Country” column. Next, right-click in the filter field above “Credit Limit” and set the criteria to greater than->100,000. Save the search as “SpainHighCredLimit“.
Now you can switch easily between any of the Saved views (Standard, CA-based, Not-USA, SpainHighCredLimit) to access the saved searches.
No matter what screen or data you’re working with, you can save and reuse search views anytime you want, in just a few clicks.
How to select saved searches with a SavedSearch Picker
But that’s not all! Reify also provides you with a faster and more productive way of switching between your saved searches. Instead of having to interact with the ListGrid every time you need to access a saved search, you can just add a Saved Search Picker to your application UI.
To do this, drag and drop the Saved Search Picker above the ListGrid in the VLayout.
Then, in the Properties tab of the Saved Search Picker, set the Target Component to the CustomerGrid and the Target DataSource property to Customer.
Using the drop-down menu in the Saved Search picker, you can quickly jump from one saved search to another.
If you build your saved searches in Reify, it remembers them, so there’s no need to rebuild the search criteria every time you start a new session. For those ad-hoc searches, users can also add their own on the fly.
Save and reuse searches efficiently with Reify
And that’s it! No longer will you be bogged down by having to enter all search criteria, again and again, now you can set your most common search needs (even if they are really complex) in Reify and use them whenever you need them.
This is just one of the amazing features available at your fingertips in Reify! No matter how complex or large the data set or filter search needs to be, Reify is up to the task. Go ahead and get creative with the grid, and most of all, save as many search queries as you need!
With Reify, you can build fully-fledged applications with CRUD operations, validations, workflows, filters, and more.
To know more about the complete power of Reify data grids, take a look here!
Thanks and enjoy
The Reify Team
Get a demo of Reify
Experience a live demonstration of the Reify low-code platform customized to your specific needs!