Adding Interactivity to Reify (Part 1 – Actions)

With any low code tool, you need a way to inject business logic into your screens. Sometimes you need complex decision-making capabilities and actions, and not just data management features. With Reify, you can quickly build the interactive screens you need using our Actions and Workflows system. Part 1 of this blog post will show how easy adding your actions to create robust process flows in your applications is. Part 2 of the blog post will dive into using the Workflow system to add even more complex business flows and logic.
Let’s get started!
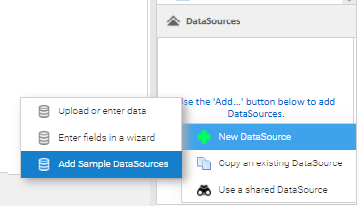
Sample DataSources will be added by default to your first project. If you don’t have the sample DataSources, you can add them by selecting Add->New DataSource->Add Sample DataSources in the bottom right-hand corner of the screen. This step will add a standard set of pre-built sample DataSources to your Reify environment.
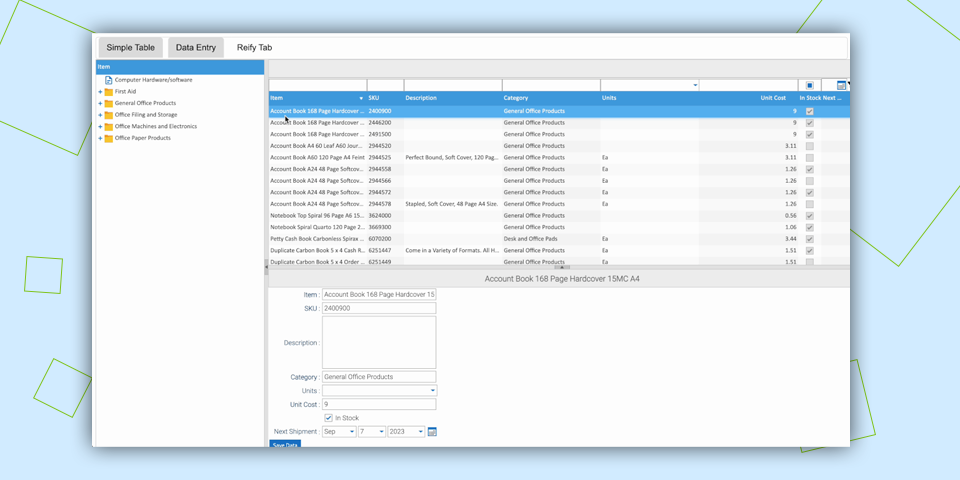
Now that we have our data set up, we are ready to get started building our screen. The screen will be a simple side-by-side grid and form for editing Customer records from the Customer sample DataSource. With Reify, creating a screen like this is very easy and just takes the few steps that are listed below:
- Drag an HLayout onto the edit Pane.
- Drag a ListGrid onto the HLayout and bind it to Customer DataSource.
- Drag a Table Layout form to the right of the Grid in the HLayout and bind it to Customer DataSource.
- After the last field, drag a Button (found as a child under Table Layout Form in the component list) onto the Customer form. Double click on the Button, and change the name to “Save”. Change the Button’s End Row value property to false (under the Properties tab on the upper left side of the screen).
- Drag another Button onto the Customer form after the last Button. Set the Start Row property value to false (this step positions it next to the Save button) and change the name to “Clear.”
Now we have a grid/form edit combination for Customers. Let’s add some actions.
First, select the ListGrid by clicking on it in the edit Pane or the component tree (found below the edit pane). Now click on the Events Tab (next to the properties tab in the top left-hand corner).
Each component has primary events for you to interact with, but by pressing the “More” button at the bottom of this section, you can see the many points you can interact with this component. For this example, we are going to use the basic event RecordClick. This event occurs when you click a record in the Grid, and we can add some actions or workflow elements to do what we want when the event occurs.
Click the RecordClick Add Action icon to the right of the event, which will present a list of components that can be acted upon. Select the Customer Form, and a list of the available actions appears. Select Edit Selected. This action will load the record that is clicked in the Grid onto Form.
Now click on the Save Button in the Customer form, and for the Click event, select Customer Form->Save Data.
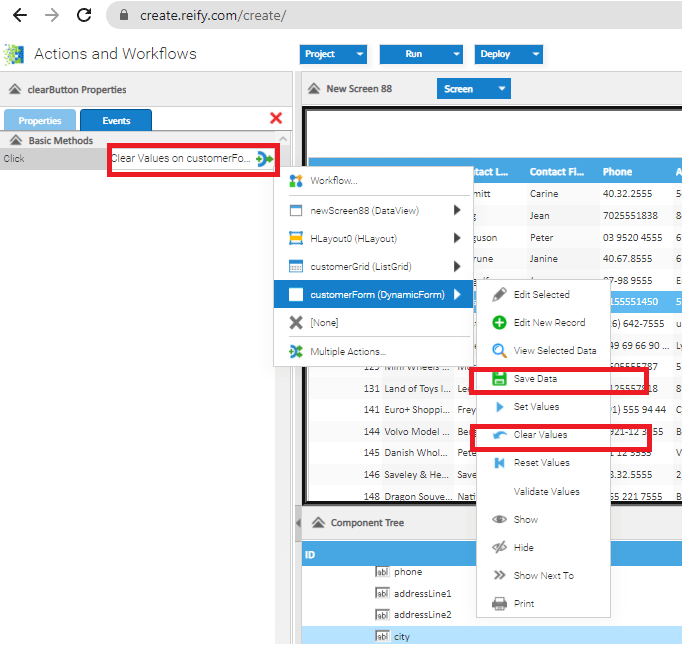
Finally, click on the “Clear” Button in the Customer form, and on the Click event, select Customer Form->Clear Values.
Now we are ready to run this simple application with our actions in place. Click the “Run” button to run the application from Reify.
See how clicking a record in the grids loads it into the form for edit. The Save button performs a database save of the changed data and the Clear button clears the values from the form.
We have just created a simple example of how to manage screen data through components with Reify actions. You can even add multiple actions to the same event without creating a workflow.
In part 2 of this series, we’ll show how to use workflows to add more advanced logic, including logic that makes decisions based on user input or stored data. Save this screen as we will re-use what we have done in the next article.
Get a demo of Reify
Experience a live demonstration of the Reify low-code platform customized to your specific needs!